Almonds, Craisins, Raisins and Sunflower seeds are always in my cupboard. I got hungry while I was driving from an interview the other day, and with no food in purse, I made a mental note to stock up on some granola bars for these occasions. So I bought a box of Nature's Valley Granola bar the next day and put two in my purse in case I get another hunger attack. I get them often but usually when I am home or work. As I was eating one of the bars, I thought to myself, why not make these with pure ingredients and no preservatives at home? Why not simply put the nuts and dried fruits I have in my cupboard together, and make my own? This is all they use, right? So here is what I came up with.
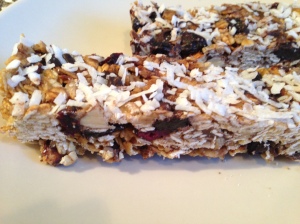
- Homemade Granola Bars

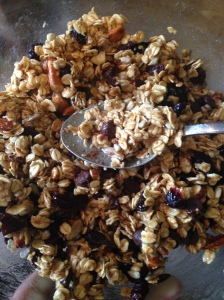
- Toffee sauce meeting the dry ingredients

Ingredients
1 ½ Cups of Old Fashion Oats (This is all I had in the house, so adjust the recipe accordingly)
¼ Cup of Raw Almonds- Chopped in two or three
2 Tbsp. Raw Sunflower Seeds
3 Tbsp. Salted Butter
2 Tbsp. of Brown Sugar
2 Tbsp. of Maple Syrup
1 Tsp. Vanilla Extract
1/4 Tsp. Cinnamon
Handful of Raisins or Craisins- I combined both
Handful of Semi-Sweet Chocolate Chips
Handful of Shredded Coconut
Pinch of Salt
Oil to grease the cookie sheet and the bread pan
Cashew (optional)
Method
Toast oat and chopped almonds for 10 minutes on a greased cookie sheet, just until you start to smell a delicious aroma. Meanwhile, make your toffee sauce with butter, sugar, vanilla, maple syrup and salt. Once melted, add to the toasted almonds and oats and stir to evenly distribute the flavor. Let cool for about 8 minutes and then add raisins/craisins and chocolate chip (and cashews if you have some handy) and stir to evenly distribute the goodness. Cover the bottom of a bread pan with aluminum foil. Lightly grease the foil and spread the granola mix in the bottom. Top with shredded coconut and press down on the mixture to make it firm. You want to pack it in as this will determine how your bars will look when you cut them, the less you press, the more space you’ll have in your bars.
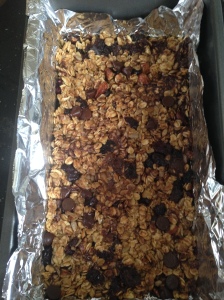
- Nicely packed in the bottom

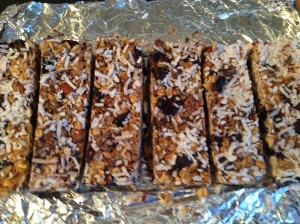
- Granola Bars are ready

Cover and refrigerate for as long as you can resist the temptation. I had mine stay overnight and they were perfect to cut in the morning. Remove from fridge and slice as narrow or as wide as you want them.
I used Ina Garten’s recipe as inspiration for this, but made adjustments based on what I had in the house. If you have a sweet tooth, you can add an extra Tbsp of sugar, maple syrup or honey. I am not big on sweets, so these were perfect for my taste buds.
Enjoy!
BNW~
No comments:
Post a Comment