Tuesday, April 15, 2014

Organic Basil, Thyme and Dill When I Want

I don't know if it is the age (I'm getting old) or if it is my new surroundings, but ever since I moved out to Colorado, I am looking at things with new eyes. Two that are of a organic eater who cares a lot more about the environment. I have stopped using plastic bags, except for the bags to separately hold my fruits and vegetables in my reusable bags. I have always preferred to make may own meals from fresh meats and vegetables but now it is as is I want nothing to do with mass produced products and such... Oh, and maybe it's the trip I took to the local landfill? I will leave this for another post as I feel gathering some statistics will add weight to my post about the quantity of household and commercial refuse that end up in there. Ok, last one, is because I am starting to watch Cosmos? All these scientific and environmental eye openers that I am exposing myself to could be the culprit here.
Back to the subject
I am not over the top as yet, but I find myself shaking my head just thinking about where I am at today mentally, and where I was a year ago as it relates to the environment and more natural produce.  All of that to say that I ended up buying some organic seeds, those listed in the subject line, along with tomatoes and peppers. I really want to have more but I have to go through this testing phase first. I planted them two weeks ago and this past weekend, I was quite the happy teenager type girl wearing pink on pink (I was actually wearing pink on pink) as I examined the pots and saw little tiny leaves and stems popping up. It's the small things in life for me. I cannot wait to see more stems and be able to pick my herbs straight from my make shift garden to my wonderful food making space. Here are some pictures, you can share in my excitement. Oh and by the way, I got these seeds on Amazon, 200-500 per pack,  some vegetable soil from Lowe's for six dollars and the party got started. Give them some water and sunlight everyday and you too will have Organic Basil, Thyme and Dill when you want.
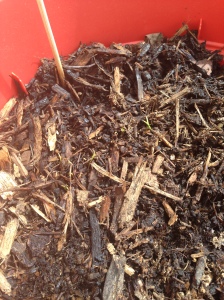
You can barely see them but they are there. Just run and grab your bifocal glasses
IMG_4661[1]
BNW~


Wednesday, April 9, 2014

Delicious Thai Basil Chicken Stir-Fry

Thai Basil Chicken Stir Fry
Delicious Thai Basil Stir Fry
Ingredients
2lbs of Chicken Breast- Sliced and chopped into bite sized chunks
½ Red Bell Pepper- Chopped
½ Green Bell Pepper- Chopped
½ Jalapeno - Chopped
3 Stalks of Scallion- Chopped
1 Onion- Chopped
1 tbsp. Sesame Seeds
1 tbsp. Sesame Oil
2 Tbsps. Vegetable Oil
1 tbsp. Cayenne Pepper
1 tbsp. Paprika
Salt to taste
Thai Basil Sauce (Recipe below )
Method
Season chicken with paprika, salt and cayenne and let marinate for at least an hour. Toast sesame seeds in a dry pan for 4 minutes; it really does add a nice flavor when toasted.  Remove from pan and set aside. Heat vegetable oil and sesame oil and fry the chicken for 3 minutes on each side (top and bottom) and set aside. Add chopped vegetables to the same pan and as soon as the onion gets translucent, add the chicken, stir and let simmer for 5 minutes. Add the sauce, salt and toasted sesame seed, cover the pan and allow them to get happy for approximately 3-5 minutes. Do not leave the kitchen because the sauce may thicken quickly and you know what comes next……. Taste and add more salt if needed. Serve over rice or noodles and enjoy your delicious stir fry dish.

Recipe for the Thai Basil Sauce
1 handful of basil leaves- Sweet basil is perfect (Finely Chopped)
1 packet of Powdered Chicken Bouillon
1 cup of water
1 Tbsp of Brown Sugar
1 Tbsp of Honey
1-2 tsps of Cornstarch or 2-4 tsp of Flour
2 Tbsp of Fish Sauce
Hot Chili Sauce- Available at all Asian Markets
Mix water, bouillon, fish sauce and chopped basil in a large pan to warm for about 5 minutes (you can also use a food processor or blender to process the mixture until the basil leaves turn into tiny particles). When warm, add honey, sugar and chili sauce and stir. Once it starts to boil, add the cornstarch, using 1 tsp at a time to thicken the sauce. If you use both teaspoons of cornstarch and it gets too thick, you can always add some water to get to your desired consistency. This is good for one dish.
Enjoy your delish feast tonight!
BNW~


Friday, April 4, 2014

Health Benefits and uses of Pomegranate

My weekly trips to the grocery store are always filled with veggies, fresh meats and an abundance of fruits. One of my favorites and one that is almost always in my shopping cart is pomegranate (if it is in season).
I grew up eating pomegranate in Jamaica, though they are a different variety than the deep red ones here in America, they are both equally tart, super juicy and delicious. Among other scrumptious descriptions, they are said to be one of the new super foods and boasts a host of health benefits. I am not in position to confirm nor deny these claims, but Dr. Fuhrman and Dr. Oz have both endorsed this delicious fruit as one to include in our diets as often as possible for the many health benefits.
Juicy Goodness
Juicy Goodness

Uses
  • You can use pomegranate in your salads for a texture and a nice burst of juice.
  • You can juice it or buy the drink for a refreshing thirst quencher
  • You can eat it as a snack to replace a candy or other high caloric midday craving "satisfier"
  • You can juice it and make a fantastic marinate for meats and seafood
  • You can use it as a beautiful addition to your cheese and crackers platter
  • You can juice it and add a tbsp to fluff, cream cheese and vanilla for a yummy fruit dip
  • I'm sure you can figure out other things that would be greatly complemented with this super food
So if you have never had a pomegranate before, give it a try, you won't regret it. And if you are a regular, try using it in a different way to add a little pizzazz to your dish or snack options. You can buy them for $2-$3 depending on where you are in the country. Enjoy one of my addictions, hopefully you'll become addicted, too.

BNW~

Thursday, April 3, 2014

Hearty Cheese, Meat and Crackers Platter

As you can see from my other posts, meat is VERY important to me. I love fruits and veggies too, but I am addicted, obsessed, hooked (you get the point) when it comes to meat. I made this spread for some friends that were stopping by my apartment recently. I knew they were coming in advance, so there was no way I would just offer them water or juice while we chatted. This is what I assembled for their visit.
Image
What's in the spread?
Mothergoose Brand Liverwurst- This is my favorite, it's smoky and has a nice meat to fat ratio- YUM
Minced Garlic and Clam Dip  (Pictured in the cabbage leaf)
Melted Brie, topped with Maple Syrup, Strawberry Jelly, Toasted Pecan Nuts and a Sprinkle of Salt, bake just until it starts to melt. This should take about 8- 10 minutes in a preheated oven.
Cucumber- Worked nicely with the clam dip
Assorted Crackers for the Cheese and Liverwurst
Toasted Pita Bread for everything
Fruits- Grapes are a must along with anything else you have in your kitchen
Being the Jamaican lady that I am, I had to serve this up with some delicious Jamaican Rum and set the tone with some reggae music and scented candle. Ah, I love people, the conversations, and laughter never get old.Feeling Good with Beres Hammond
Image

BNW~


Homemade (Chewy and Delicious) Granola Bar

Almonds, Craisins, Raisins and Sunflower seeds are always in my cupboard. I got hungry while I was driving from an interview the other day, and with no food in purse, I made a mental note to stock up on some granola bars for these occasions. So I bought a box of Nature's Valley Granola bar the next day and put two in my purse in case I get another hunger attack. I get them often but usually when I am home or work. As I was eating one of the bars, I thought to myself, why not make these with pure ingredients and no preservatives at home? Why not simply put the nuts and dried fruits I have in my cupboard together, and make my own? This is all they use, right? So here is what I came up with.
Homemade Granola Bars
Toffee sauce meeting the dry ingredients
Ingredients
1 ½ Cups of Old Fashion Oats (This is all I had in the house, so adjust the recipe accordingly)
¼ Cup of Raw Almonds- Chopped in two or three
2 Tbsp. Raw Sunflower Seeds
3 Tbsp. Salted Butter
2 Tbsp. of Brown Sugar
2 Tbsp. of Maple Syrup
1 Tsp. Vanilla Extract
1/4 Tsp. Cinnamon
Handful of Raisins or Craisins- I combined both
Handful of Semi-Sweet Chocolate Chips
Handful of Shredded Coconut
Pinch of Salt
Oil to grease the cookie sheet and the bread pan
Cashew (optional)

Method
Toast oat and chopped almonds for 10 minutes on a greased cookie sheet, just until you start to smell a delicious aroma. Meanwhile, make your toffee sauce with butter, sugar, vanilla, maple syrup and salt. Once melted, add to the toasted almonds and oats and stir to evenly distribute the flavor. Let cool for about 8 minutes and then add raisins/craisins and chocolate chip (and cashews if you have some handy) and stir to evenly distribute the goodness. Cover the bottom of a bread pan with aluminum foil. Lightly grease the foil and spread the granola mix in the bottom. Top with shredded coconut and press down on the mixture to make it firm. You want to pack it in as this will determine how your bars will look when you cut them, the less you press, the more space you’ll have in your bars.
Nicely packed in the bottom  
Nicely packed in the bottom
Granola Bars are ready
Cover and refrigerate for as long as you can resist the temptation. I had mine stay overnight and they were perfect to cut in the morning. Remove from fridge and slice as narrow or as wide as you want them.
I used Ina Garten’s recipe as inspiration for this, but made adjustments based on what I had in the house. If you have a sweet tooth, you can add an extra Tbsp of sugar, maple syrup or honey. I am not big on sweets, so these were perfect for my taste buds.

Enjoy!
BNW~


Sunday, March 30, 2014

I Made Homemade Mozzarella Cheese and So Should You!

I have been wanting to try to make some more seemingly difficult products at home for a while. Cheese was at the top of the list for the past year but I have always found a reason not to make it. In my defense, the ingredients were not available in the local grocery stores and I couldn't find any specialty shops close by, and it was not worth the effort to track down stores online and make it just for myself. This never left my mind, so I finally bought aaaa-lll-lllll the supplies I needed online (2 items), citric acid and some rennet tablets, I got milk from the grocery store and this is how it all played out.
All of the ingredients and tools needed for this fun experiment
I had already bought the Junket Brand Rennet before I did extensive research about it's strength. Since it is the weakest one on the market, I had to use more than the instructions stated. I found this out on a random website that sells cheese making supplies.
Ingredients
1 Gallon of Whole Milk- Not Ultra Pasteurized
1 1/2 Rennet Junket Tablets, or 1/4 Tablet if you use the strong Cheese Making one- dissolved in 1/4 cup of water
2 Tsps of Citric Acid- dissolved in 1/2 cup of cold water
Salt
You'll also need:
A Thermometer
Slotted Spoon
A Large Microwavable Bowl
A Large Pot
A Microwave
A long knife
Method
Empty milk and citric acid that you've dissolved into a deep pot and stir. Heat milk until it gets to 90 degrees Fahrenheit. Add the rennet and stir to distribute evenly for about 30 seconds and remove from heat. Cover and let sit for 10 minutes. You should have a nicely formed curd separated from the whey. Dice the curd by making horizontal and vertical strokes with your knife and return the pot to the burner to cook the curd. Keeping stirring the curd and as soon as it gets to 105 degrees, remove from the heat.
Time for fun

With your slotted spoon, scoop out the curds into your microwave safe bowl and drain the excess whey. Microwave for one minute, and then knead the curds and drain more whey. The curds will be hot so use a pair of clean rubber gloves and keep the cold water running to cool down your hands in the process. Microwave for another 30 seconds, and stretch and knead some more. This is where it may get tricky, you could stop here, but if your cheese (at this point) is not stretchy and shiny, microwave for another 15 seconds and as you stretch and knead some more, drain and add your salt. I added 1 tsp of salt but this is up to you. I ended up making a brine of water, salt and whey for the cheese because I wanted it to be more salty, so I'd say go with at least 1 and a 1/2 tsp. Fold your cheese and wrap it to form a large ball or small balls for petite mozzarella balls. Served with your favorite fruits, crackers and balsamic and basil soaked tomatoes slices. So yummy, quick and easy and  it's like magic. Enjoy immediately or wrap your cheese and refrigerate for a couple days of enjoyment. Please share this recipe with a friend, come back often.
Recipe should yield just under 1 lb of cheese.
I was so excited that I couldn't wait to cut into my homemade cheese.
BNW~

Please note**** I used the recipe that comes with the Junket Rennet, but made modifications to the amount of rennet I used.

Thursday, March 27, 2014

Baked Whole Orange Chicken

I cannot remember the last time I cooked a whole chicken..you? Anyways, I was walking through the whole food store and saw heavy traffic in the meat area so I joined the crowd. Pork tenderloin, whole chicken, and boneless skinless chicken thighs were all on sale. Hmmmm, I kinda sorta bought all three, it's 50% sale, I cannot afford to pass on these great deals. Here is my little fresh chicken :)
Image
I looked around my kitchen, I had lemon, lime, orange, mango, pears and a couple heavily spotted bananas. I have a thing with bananas, the spottier they are, the harder it is for me to eat them. I am trying to say it in a nice way, but I think they are next to gross. I am getting off topic, so back to the chicken. I decided to use orange and lemon from the fruit bowl. My seasonings rack is overload so I knew I could pull something together to give some bold flavor. These were my ingredients and semi seasoned chicken.
Image
And before I popped it in the oven..... I didn't have an cooking string but found a lovely tutorial on how to truss without a string on YouTube [youtube=http://www.youtube.com/watch?v=S14l9dx3hkw]
Image
Ingredients
1 Whole Chicken
1 Lg Onion
1 Stalk of Celery
1 Orange
1/2 Cup of Orange Juice (if you do not want a crispy skin)
1 Tbsp of Black Pepper
1 Tbsp of Lemon Pepper
1 Tbsp of Rosemary
2 Tbsp of Butter
1 Whole Head of Garlic
A Handful of Cilantro
A Lot of Salt
Method
Remove offal and any giblets from inside the chicken. Season the inside with salt and pepper and add rosemary, thyme,cilantro, garlic, 1/2 onion, 1/2 orange sliced, and 1/2 celery. Truss chicken to keep all of this goodness inside. Season the outside with lemon pepper, salt and black pepper. You have to use a lot of salt so liberally coat every single part of the chicken with salt. Sprinkle the remaining herb,seasonings and orange slices on the bottom of the pan, and pour on 1/4 cup of orange juice. Place the beautifully seasoned chicken on top and bake for an hour and 45 minutes. Meanwhile, heat the remaining orange juice with butter just until it starts to thicken. Baste chicken with the orange butter, 30 minutes before you remove it from the oven and again at the 15 minutes to go mark. Be sure to test the temperature before you declare your chicken COOKED, it should read 170 at the breast area and 180 for the darker pieces of meat. Let stand for 15 mins and then dig in. So delicious. You can add your twist to this dish as I did. I added a bold font to the things that I learned.
Look what happened!
Image
I needed more orange juice in the pan
I dressed it up for dinner...
Image
Beautiful chicken
Enjoy
BNW~