Showing posts with label food. Show all posts

Sunday, January 4, 2015

Korean Style BBQ Pork Riblets

I love having friends from all over the world. I got the secret to a simple Korean BBQ Sauce from my dear friend Judy. Growing up with a Korean mom, she documented the skillful cooking styles and ingredients that makes Korean dishes so tasty and easy to prepare. I asked her for a quick recipe for a BBQ and she said, simply use brown sugar, soy sauce, ginger and scallions and add whatever you want to it. Well, needless to say, I added my twist to the base of the classic Korean BBQ sauce in a subtle way, and here it is. Give it a shot and tell me what you think.
IMG_6103.JPG
Ingredients
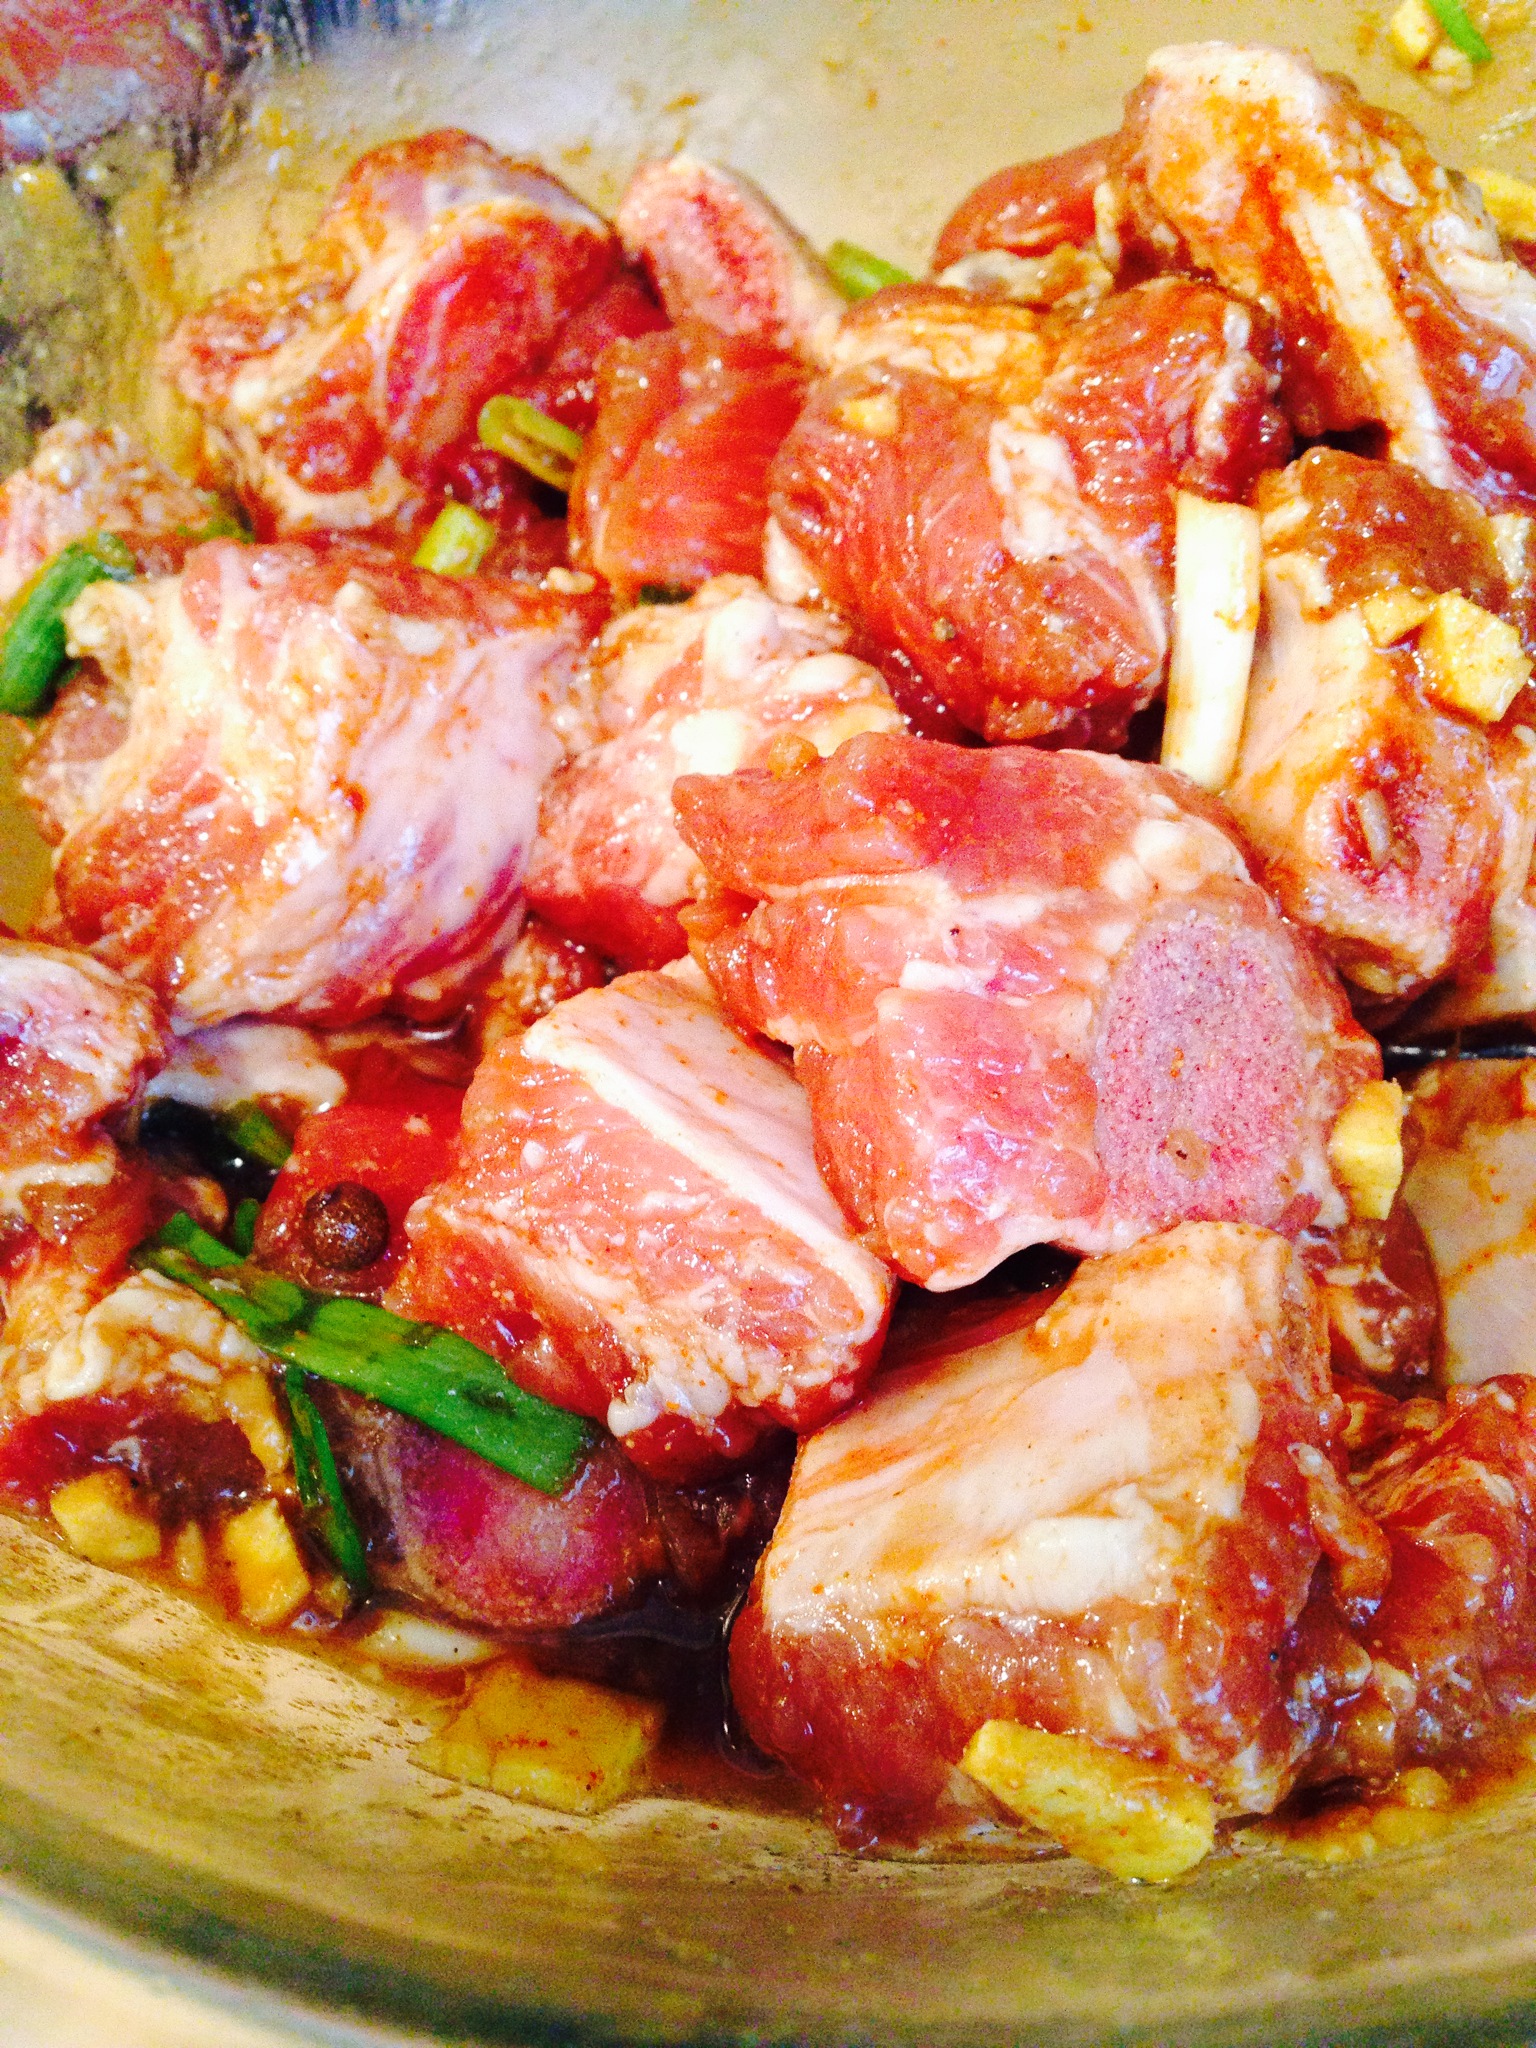
2lbs of Pork Riblets- cut to bite sized chunks
2 Tbsp of Grated Ginger plus 1 tsp for garnish
2 Stalks of Scallion (Green Onion) plus 1 for garnish
1/4 Cup Brown Sugar
1/4 Cup Soy Sauce
2-3 Tbsp of Warm Water
1 Tbsp Garlic
1Tbsp Sesame Oil
1 Tbsp Toasted Sesame Seeds plus 1 tsp for garnish
6 Jamaican Allspice Berries (Pimento Seeds)
2 Tsp Cornstarch
Method
Dissolve brown sugar in warm water and stir in soy sauce. Pour over meat and mix in with your fingers (I always wear gloves when I work with meat). Add garlic, scallion, sesame oil, pimento seeds and ginger. I used the regular soy sauce so it was nice and salty, and eliminated the need for more salt. Allow to marinate for at least an hour or overnight.
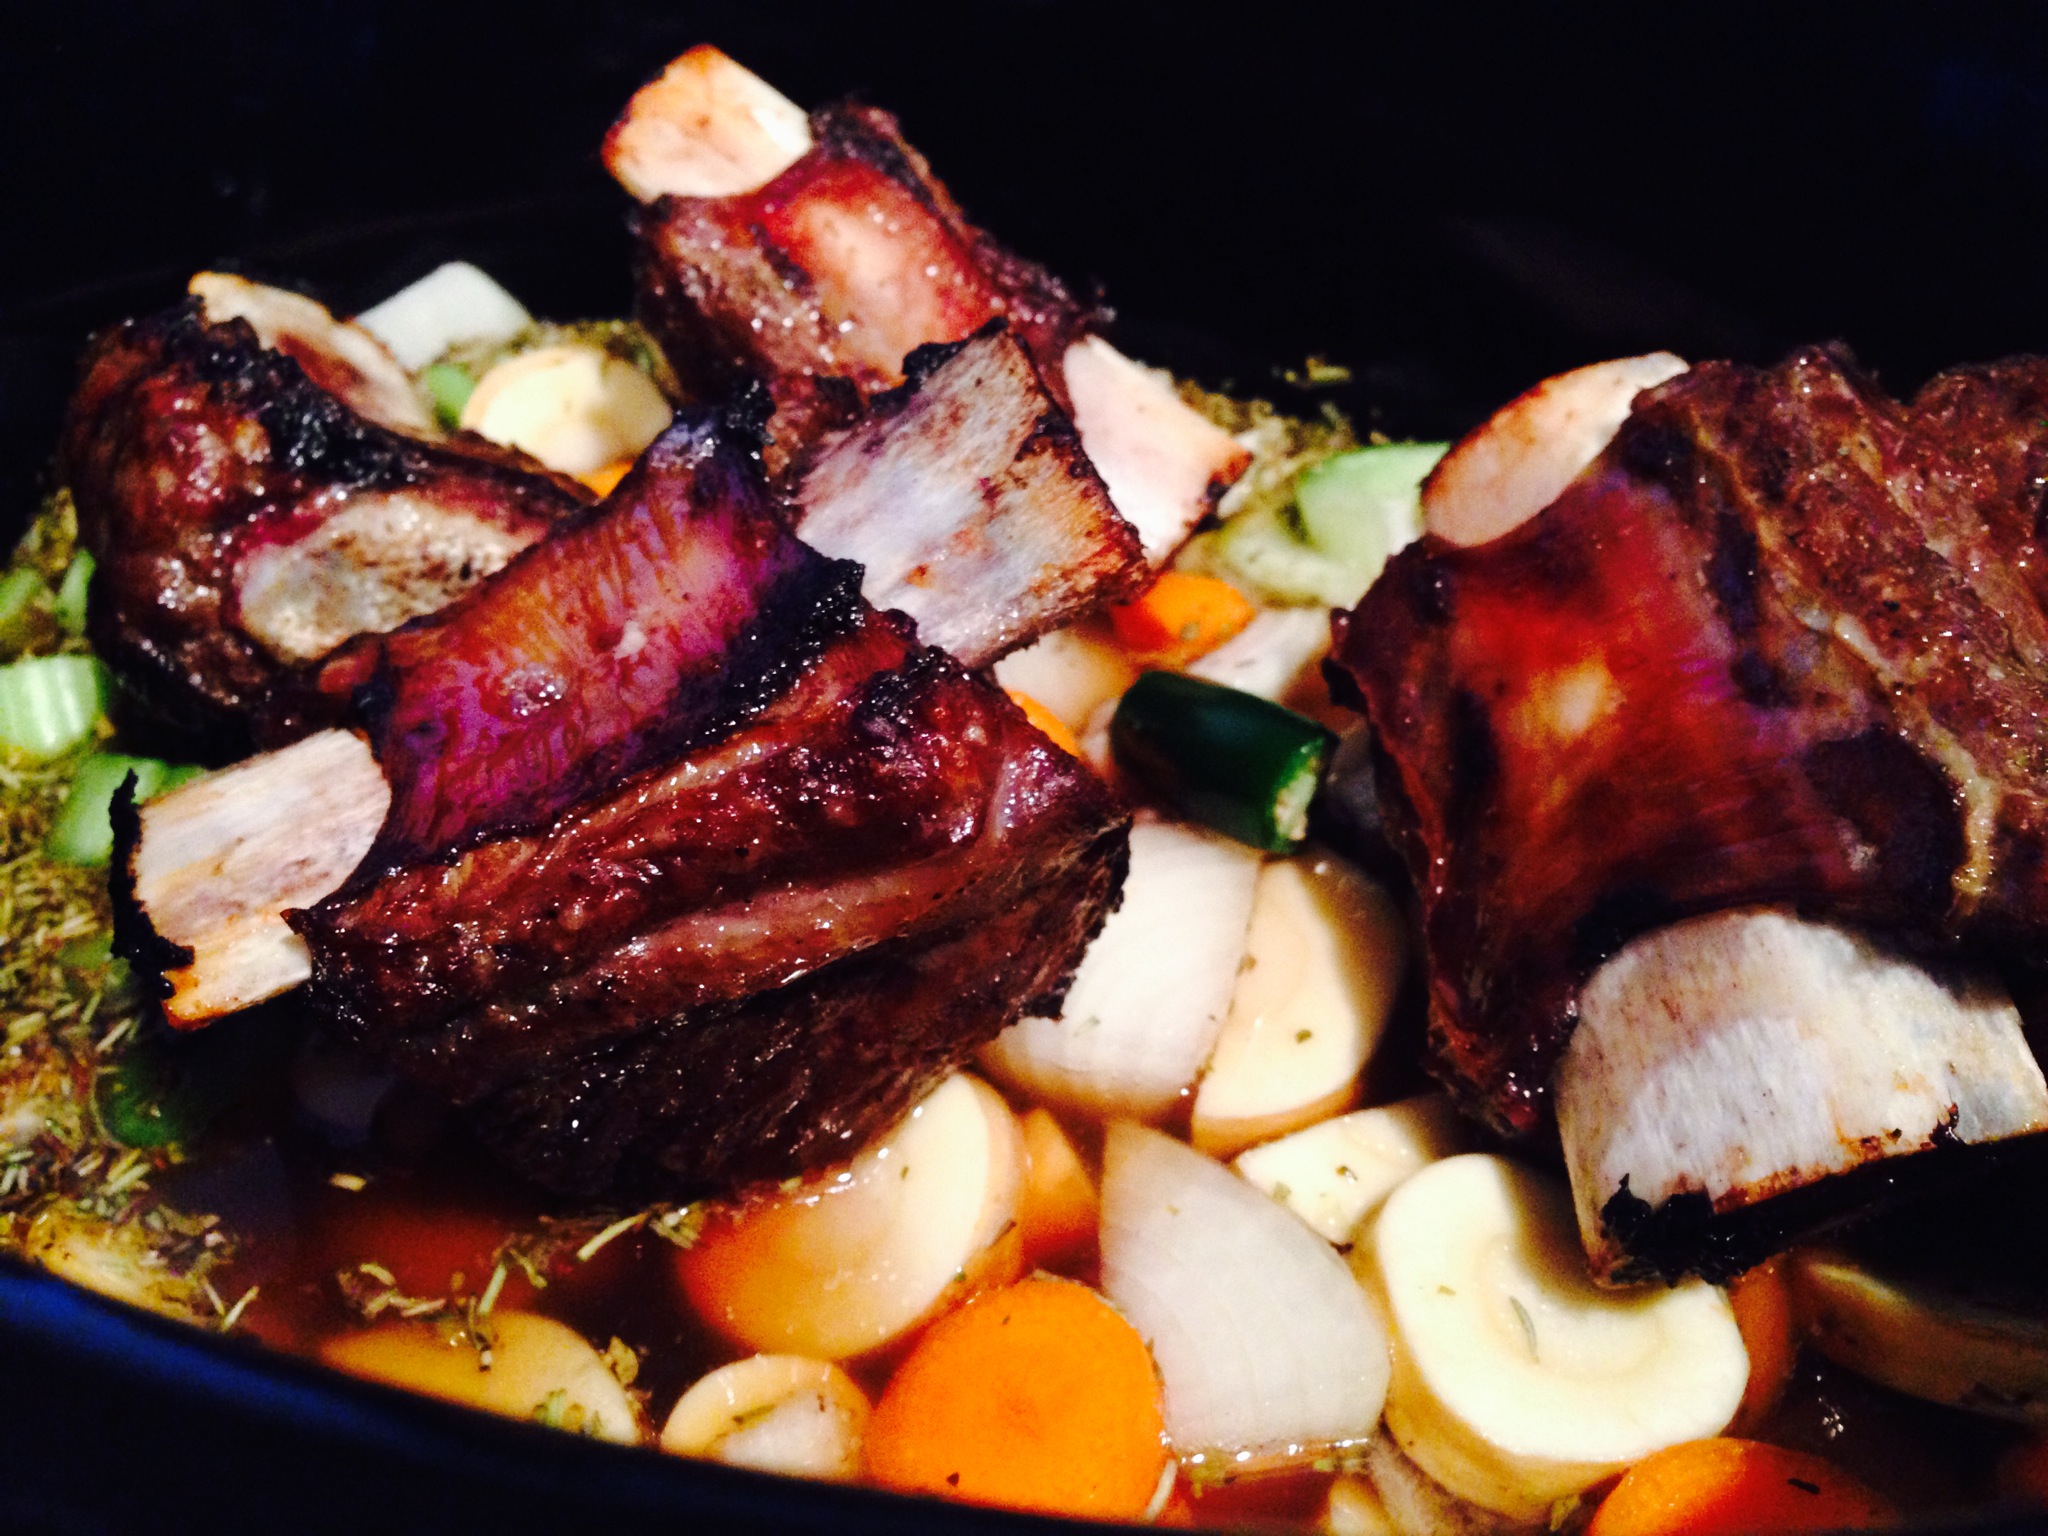
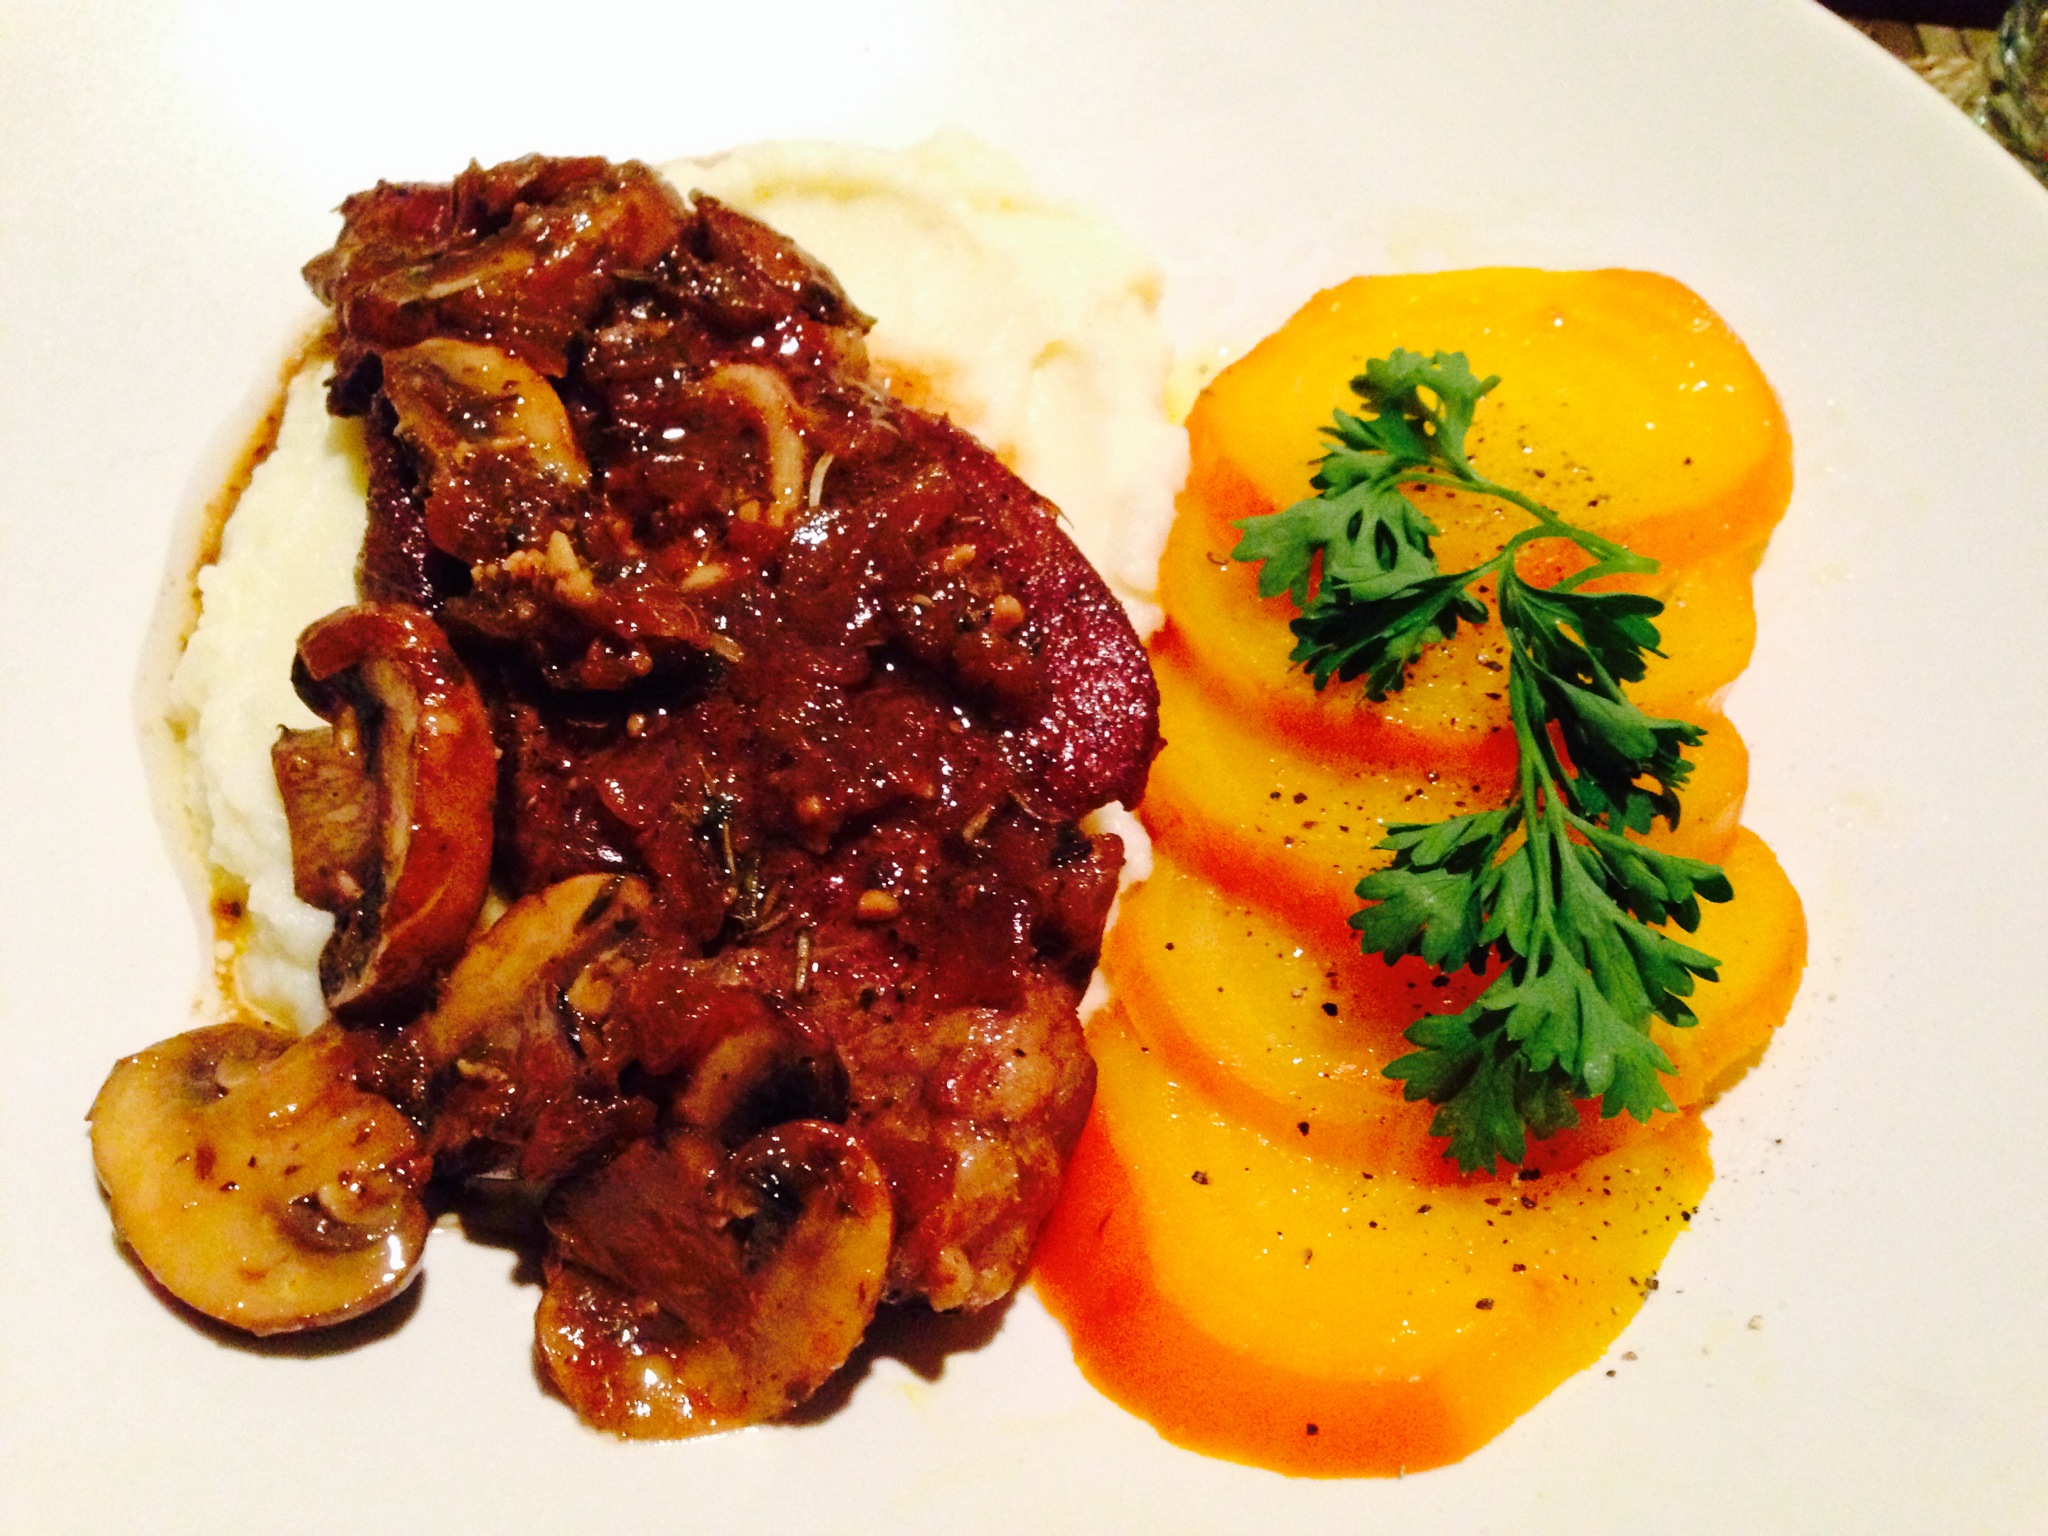
Preheat oven to 375 degrees. Remove the meat from the marinade and arrange on a foil covered cookie sheet. Bake for 50 minutes, flip each piece after 30 minutes. Pour the marinade in a saucepan and add 1/2 cup of water and 1/2 of the sesame seeds. Simmer until the sauce starts to thicken. Dissolve cornstarch in cold water and add to sauce. Stir and allow to thicken for 5 minutes and then remove from heat. Place Riblets on a dish and garnish with fresh ginger, sesame seeds and scallions. Pour remaining sauce in a souffle cup or small bowl for dipping. This is lovely, so I hope you'll enjoy it.
IMG_6101.JPGIMG_6099.JPG

 
I love meat!
~BNW

Monday, September 8, 2014

DaVaughn's Cola Beef Short Ribs with Snow Peas and Mashed Sweet Potatoes

IMG_5795.JPG
After the 3rd glaze
This is one of the recipes that I will continue to use over the next UMTEEN years. I mean, you guys know how much I love meat, right? So just imagine, fall off the bone tender and flavorful meat that boasts a mouthwatering succulent look for the presentation. I am all over this one.
Back story:
DaVaughn made these ribs for me after a fun trip to the farm to pick some blueberries and cherries in the summer of 2013. We decided to do a Potluck to extend our time together on that fine Sunday evening. The two guests brought sides and desserts and the host (DaVaughn) took care of beverage and entree. I brought some roasted brussel sprouts with onion and bacon and Mike, the other guest brought a nicely seasoned cheesy rice and a corn and cream dessert. All delicious but the star of the evening was the meat, so let's get back on track.
I started with just one piece, in fact, we all started with just one piece of this deliciousness and then it was like a race to finish it off. One bite into the meat and were rejoiced, the symphony started and shouted YES, YEs, Yes, yes, DaVaughn,  "what the February" just happened? How did you make these? Recipe please? Hold on, let me grab another piece while you talk. I might be exaggerating here, but the ribs are so freaking good. And, better than any ribs that I'd ever made. Needless to say, I made my version the weekend after, and have been treating my special guests to these ribs if I feel they deserve it :). No hate mails if I haven't yet cook these for you please. Here's my version of DaVaughn's recipe- crock-pot style.
Ingredients
2 lbs of Beef Short Ribs
1 Can of beef Stock
1 Can of Beef Consomme
1 Can Pepsi or Coke
Trio of Herb - (Thyme, Oregano, Rosemary)
1 Small Onion
2 Stalks of Celery
1 Jalapeno
1 Parsnip
1 Carrot
Salt and Pepper
Snow Peas
Sweet Potatoes
Butter
 
IMG_5789.JPG
All in, time for fun
Method
Chop all of the veggies and add to crock-pot along with the herbs, stock, consomme and half of the soda. Turn crock-pot  to high, cover and allow the veggies to warm up. While the veggies heat up, remove excess fat from the ribs and season with salt and pepper. Broil for 5 minutes on one side and flip and broil for another 5 minutes on the other side. Add to the crock-pot, turn the temperature to low and allow to cook for 9-10 hours. You want to ensure that the meat touches the bottom so make way and get them to cook in the liquid. I started this right before work and I got home in time to do the finishing touches 9 1/2 hours later.
What DaVaugh does to make that glistening glaze. Remove ribs and set aside on an oven tray. Bring the liquid to a deep pot and cook for 5 minutes, stir and season as needed. Strain into a saucepan and add the remaining soda. Allow to simmer until it starts to get syrupy. Remove from heat at this time and brush the ribs liberally. Bake for 5 minutes. Repeat the glaze and baking process 1 more time and then add glaze a third time and broil for 2 minutes to lock in the sauce and add more color. Remove from oven and let cool. Drizzle with remaining sauce and serve with Snow Peas (I used the same recipe to cook this Sugar Snap Peas so you can just substitute the vegetables) and Mashed Sweet Potatoes. Roast potatoes until tender. Cut open and scoop out the flesh, add salt and butter and mash with a fork. Dinner is ready my dear, thanks to me and D.
 
IMG_5796.JPG
Super Tender and Yummy Beef Short Ribs Dinner
 
BNW~ and DVB~
 

Thursday, August 28, 2014

Spicy Thai Chicken with White Rice

This was an interesting blend of spices and flavors for me. So bold yet delicate.
IMG_5806.JPG
 Ingredients
2 Chicken Breasts (Sliced) and seasoned with
  • Garlic Salt
  • White Pepper
  • All Purpose Seasoning
1 Packet of Coconut Powder or 1 Can of Coconut milk
1 Tbsp of Powdered Ginger
3 Stalks of Scallion (Chopped)
1 Medium Onion (Sliced)
2 Cloves of Garlic (Mashed)
Chopped Peanuts and Cashews for Garnish
1 Tbsp Maple Syrup
1 Tsp of Crushed Red Pepper
Salt to taste
 
Method
Heat oil and sautee chicken for 5-7 minutes, just until the juices run clear. Remove from pan and add the onion, garlic, 2 stalks of the chopped scallion and allow to cook until the onion becomes translucent. Dissolve coconut powder in a cup of warm water and add to pan, or empty a can of coconut milk in the pan along with maple syrup and ginger. Stir and return chicken to the pan and let simmer for 2 minutes to soak up the flavor. Add the crushed pepper and salt and serve over rice. Top with remaining chopped scallion and nuts.
Deliciousness awaits!
BNW~
IMG_5804.JPG
BNW~

Sunday, August 24, 2014

Roasted Golden Beets

Beets and I always had a love hate relationship, more of the hate from me, though. As a child, I never really gave beets the time of day. It tastes like dirt, I used to tell my mom. Thankfully those days are gone, and I'm now a huge fan. Red, golden or sugar, give it to me. Here's a quick recipe for roasting golden beets.
 
IMG_5782.JPG
 
Ingredients
2 Golden Beets
Salt and pepper
Vegetable Oil- enough to cover the beets completely
1 Tbsp of Butter (melted)
Parsley for garnish
 
Method
Heat oven to 425 degrees. Cut off the top and bottom from the beets and season them with salt and pepper and oil and wrap in aluminum foil. Place on the center rack in the oven and bake for 45 minutes. Remove from oven and allow to cool a bit. Scrape off the skin and slice or dice the beets, drizzle with melted butter and sprinkle with more salt and pepper. Dive in :)
 
IMG_5780.JPG
BNW~

Trio of Herb Lamb Shoulders with Mashed Cauliflower and Golden Beets

I know that Lamb is the kind of meat that you either like or hate, you can cook it well, or you just can't be bothered. So here's a recipe that may turn you into a lamb cooking queen or king. I incorporated a Jamaican cooking technique to get this meat tender, easy to cook and pretty tasty in a short amount of time. It takes less than an hour to cook but the same amount of time is needed for it to marinate, so plan accordingly. Let's go!
IMG_5783.JPG
 
Ingredients:
2 Lamb Shoulders
1/4 of a Large Onion (chopped)
1 Teaspoon of Minced Garlic
1 Teaspoon of Oregano
1 1/2 Teaspoons Rosemary
Two Sprigs of Thyme
Dash of Soy Sauce
Salt and Pepper (1/4 tsp each or to taste)
1/2 Cup of Baby Bella Mushroom (chopped)
3/4 Cup of Warm Water
1 Tablespoon of Oil
Crushed Red Pepper (Optional)
 
Method:
Season lamb with all of the ingredients except mushroom, oil and water. Let marinate for at least an hour. When ready to cook, heat oil in a heavy medium pan, scrape seasonings from the lamb and brown on each side. Add seasonings back to the meat once browned, and add water and cover. Cook for 30 minutes, turning the neat once and then add the mushrooms and cook for another 10 minutes. Meat should be just well done at this point, so if you need it medium, only cook it for 5 minutes after you've added the mushrooms. Rare, hmmm, I don't know, maybe only cook it for 30 minutes total? give it a shot and let me know.
You can find the recipe for the golden beets here.
For the cauliflower, I boiled them for 20 minutes. Added them to the blender, with milk, butter, a couple dashes of grated parmesan and salt. Blend until smooth and there you go!
Enjoy!
IMG_5781.JPG
BNW~

Sunday, August 10, 2014

Pure Vegetable Sautee

Yummy Veggies. I love vegetables, if I had to pick two food groups that I would eat from for the rest of my life, they would definitely include vegetables and meats. So here's to a great pure recipe filled with delicious goodness. Super easy, quick and inexpensive.IMG_5649.JPG 
Ingredients
1/2 lb Baby Bella Mushrooms
1/2 Zuchini
1/2 Summer Squash
1/2 of a Small Red Bell Pepper
Jalapeno (a slice or two, depending on your tolerance for heat)
1 Tablespoon of Soy Sauce
1 Tablespoon of Real Butter
Drizzle of Olive Oil 
Salt to taste

Method:
Wash and chop vegetables and add to pan. Drizzle with soy sauce, olive oil and butter and salt. Cover and let steam for 5 minutes on medium heat. Stir and cook for another 2-3 minutes. Serve as a side with some delicious meat and   My Rice and Peas.
 
Enjoy and your feel free to share your feedback! Violeta, this one is for you.
 
BNW~

Sugar Snap Peas Sautee

Sugar snap peas- need I say more? Crunchy, nutty, fresh and delicious- I just did. Anyways, here is a quick recipe to whip some up tonight, or tomorrow night.
IMG_5656.JPG
 
Ingredients
1 lb Sugar Snap Peas
1/4 Cup of Chopped Onions
1 Tsp of Minced Garlic
1 Tbsp of Maple Syrup
1 Tbsp of Butter
1 Tsp of Olive Oil
Salt to taste
 
Method:
Heat butter and oil and add garlic and onion. Cook until onion become translucent and the mouth watering aroma starts to fill the air. (a little dramatic) Add peas and stir. Sprinkle on salt and maple syrup, cover and let cook for no more than 5 minutes. You can remove them after 3 minutes if you like them crisp or allow them to hang out for 5 minutes where they are just right me (for my taste).
 
Enjoy and Violeta, this one is for you, too :)
 
BNW~

Tuesday, July 22, 2014

Fancy Vegetable Meat Sauce over Spaghetti

 Not your typical spaghetti and meat sauce 
 20140713-112545-41145350.jpgIngredients
1 lb Ground Beef
1 Tbsp Steak Seasoning
1 Tbsp of Olive Oil
1Tbsp of Butter
2 Stalks of Celery
4 oz Mushroom
1 Onion
2 Cloves of Garlic
1 Small Yellow Bell Pepper
1/2 Zucchini
1 Jalapeno
1/2 lb Chipotle Beef Sausage (thinly sliced)
2 Cups of your favorite Pasta Sauce
Chili Powder
Salt and Pepper
Method Chop all veggies and set aside. Heat oil and butter for 3-4 minutes. Sautee onion and garlic until onion becomes translucent. Add remaining veggies and cook for 5 minutes while you stir. Remove from pan. Add beef while carefully pulling it apart in the pan. Season with steak seasoning and sautee until meat is completely brown. Add veggies back to the pan and top it off with the chipotle sausage. Cover the pan and allow the meats and flavor to marry (yes, yes they do). Add sauce and season with salt and pepper to taste. Serve over spaghetti and top with freshly chopped parsley.

Enjoy!
BNW~
20140713-112546-41146986.jpg 20140713-112548-41148517.jpg

Wednesday, June 4, 2014

Eggplant Parm Cookies- Quick, Delicious and Easy

20140529-193114-70274403.jpg
 If you are not a fan of eggplant for whatever reason, you NEED to give this recipe a shot. It's quick, easy, delicious and quite affordable. This recipe was shared with my and I added stuff to make it my own. I must thank Alexis over there in NH for opening a whole new world of deliciousness in front of me. Here goes:  
Ingredients
1 Eggplant
1 Cup of Pasta Sauce
1 Cup of Shredded Cheese
2 Tablespoon of Grated Parmesan Cheese
1/2 Cup or Seasoned Bread Crumb (I prefer Panko)
2 Large Eggs- Beaten
Dried Parsley  
Method:
Preheat oven to 375 degrees. Wash eggplant and slice (thinly) cross ways to get round pieces. Dip each slice in the egg mixture, then roll in breadcrumb and arrange on a foil lined cookie sheet. Once all the slices have been covered with egg and breadcrumb bake for 15 minutes in preheated over. Remove from oven and cover each slice with 1-2 spoons of pasta sauce, then sprinkle with cheese and parsley. Return to oven and cook for another 7-10 minutes, just as the edges start to turn golden brown. Remove from oven and allow to cool for 5 minutes. Sprinkle with salt and serve to some well deserving tummies.


20140529-200102-72062908.jpg  BNW~

Sunday, May 18, 2014

Pork and Pineapple Stir Fry

20140515-201126.jpg


After my late night outings on the weekends, I usually stop for $1.25 tacos on my way home. It's quite a popular spot for the drunks in town, similar to a diner at 2 in the morning. The difference is that this restaurant serves all Mexican cuisine and attracts majority latinos, but there is something there for everyone, even if it's just rice and a beverage. There is something about those tacos that keeps me going back for more in the wee hours of the cold and somewhat windy Denver nights. I love it so much, so that I decided to make a stir fry using my late night snack as the inspiration. They use diced pork nicely seasoned and grilled on the outdoor hot surface with pineapple and onion. Here is my take on the $1.25 taco filling.

Ingredients
1.5lbs Diced Pork (moist and tender)
3 Strips of Bacon (fried and cut into bite sized pieces)
3 Slices of Pineapples
1/2 Bell Pepper
Two Slices of Onion
Two Cloves of Garlic
All Purpose Seasoning
Oregano
Salt and Pepper
2 Tablespoons Vegetable Oil

Method
Season pork with salt and pepper, oregano,  and all purpose seasoning and let marinate while you chop the vegetables, pineapple pieces and fry the bacon strips. Heat pan and add vegetable oil. Sautee pepper, onion, garlic stirring occasionally until they start to soften. I like to do this as it will add flavor to the oil prior to cooking the meat. Add the meat and let cook for 6 minutes turning twice. Add pineapple chunks, bacon pieces and water, cover and cook for another 5 minutes. Stir, taste, add more salt and pepper if needed and cook for 2-3 minutes. Allow the stand for a few minutes before you serve.
I served this deliciousness with country wild rice blend. Super tasty combination.
Notes
This is not a spicy dish, but if you want some heat, simply add some habanero or jalapeno with the bell pepper. Also, you can serve this in corn taco shells like they do at the Mexican restaurant where I got the inspiration for this dish. It was perfect with the rice, so the choice is yours. Enjoy whichever you choose~
20140515-201149.jpg

BNW

Thursday, May 8, 2014

Ground Chicken and Kale Soup

20140508-184705.jpg
Deliciousness
I bought some ground chicken over the weekend..... simply because it was on sale. I love to win whenever I go to the grocery store, and this is my way of #winning where savings and freshness are concerned. But, two days had passed and I still couldn't figure out what I wanted to do with this chicken, so I ignored it for another day, which is exactly what you would have done, right? Anyways, I came home from work one evening and went to the kitchen and started to think about dinner. I opened the fridge and there it was, a pound of ground chicken staring at me, so did what a responsible foodie would do....

Ingredients
1 lb Ground Chicken
6 Kale Leaves - Remove stalks and chop leaves
3 Stalks of Celery- Chopped
1 Acorn Squash- Peel, remove seeds and dice
2 -3 Carrots- Chopped
1 Small Onion-Chopped
2 Cloves of Garlic- Minced
3 Packs of Powdered Chicken Bouillon 
1 Can of Corn
Salt and Pepper
4 Tablespoon Vegetable Oil 
Water

Method
Season chicken with salt and pepper and then sautee in 2 tablespoon of heated oil. Stir after 5 minutes to get the other sides to cook. Once cooked (about 10 minutes total), remove from heat and set aside. In a deep pot, heat the remaining 2 tbsp of oil and sautee celery, carrots and onion until onion becomes translucent. Add 4 cups of water, acorn squash and 2 packets of bouillon and cook for 15 minutes. Add corn, chicken and kale and more water if needed. Taste and then add 1/2  or the whole packet of the remaining bouillon. I used 1/2 packet first and then a little more and it was perfect.  So after you season to get to your desired taste, cook for another 15 minutes and serve hot with croissants and your favorite salad.
Notes
You can make it spicy by adding a whole jalapeno or some crushed red peppers. You can also use chicken stock instead of the bouillon to get a rich chicken flavor for your soup. Enjoy~

BNW

Tuesday, April 15, 2014

Organic Basil, Thyme and Dill When I Want

I don't know if it is the age (I'm getting old) or if it is my new surroundings, but ever since I moved out to Colorado, I am looking at things with new eyes. Two that are of a organic eater who cares a lot more about the environment. I have stopped using plastic bags, except for the bags to separately hold my fruits and vegetables in my reusable bags. I have always preferred to make may own meals from fresh meats and vegetables but now it is as is I want nothing to do with mass produced products and such... Oh, and maybe it's the trip I took to the local landfill? I will leave this for another post as I feel gathering some statistics will add weight to my post about the quantity of household and commercial refuse that end up in there. Ok, last one, is because I am starting to watch Cosmos? All these scientific and environmental eye openers that I am exposing myself to could be the culprit here.
Back to the subject
I am not over the top as yet, but I find myself shaking my head just thinking about where I am at today mentally, and where I was a year ago as it relates to the environment and more natural produce.  All of that to say that I ended up buying some organic seeds, those listed in the subject line, along with tomatoes and peppers. I really want to have more but I have to go through this testing phase first. I planted them two weeks ago and this past weekend, I was quite the happy teenager type girl wearing pink on pink (I was actually wearing pink on pink) as I examined the pots and saw little tiny leaves and stems popping up. It's the small things in life for me. I cannot wait to see more stems and be able to pick my herbs straight from my make shift garden to my wonderful food making space. Here are some pictures, you can share in my excitement. Oh and by the way, I got these seeds on Amazon, 200-500 per pack,  some vegetable soil from Lowe's for six dollars and the party got started. Give them some water and sunlight everyday and you too will have Organic Basil, Thyme and Dill when you want.
You can barely see them but they are there. Just run and grab your bifocal glasses
IMG_4661[1]
BNW~


Friday, April 4, 2014

Health Benefits and uses of Pomegranate

My weekly trips to the grocery store are always filled with veggies, fresh meats and an abundance of fruits. One of my favorites and one that is almost always in my shopping cart is pomegranate (if it is in season).
I grew up eating pomegranate in Jamaica, though they are a different variety than the deep red ones here in America, they are both equally tart, super juicy and delicious. Among other scrumptious descriptions, they are said to be one of the new super foods and boasts a host of health benefits. I am not in position to confirm nor deny these claims, but Dr. Fuhrman and Dr. Oz have both endorsed this delicious fruit as one to include in our diets as often as possible for the many health benefits.
Juicy Goodness
Juicy Goodness

Uses
  • You can use pomegranate in your salads for a texture and a nice burst of juice.
  • You can juice it or buy the drink for a refreshing thirst quencher
  • You can eat it as a snack to replace a candy or other high caloric midday craving "satisfier"
  • You can juice it and make a fantastic marinate for meats and seafood
  • You can use it as a beautiful addition to your cheese and crackers platter
  • You can juice it and add a tbsp to fluff, cream cheese and vanilla for a yummy fruit dip
  • I'm sure you can figure out other things that would be greatly complemented with this super food
So if you have never had a pomegranate before, give it a try, you won't regret it. And if you are a regular, try using it in a different way to add a little pizzazz to your dish or snack options. You can buy them for $2-$3 depending on where you are in the country. Enjoy one of my addictions, hopefully you'll become addicted, too.

BNW~

Thursday, April 3, 2014

Hearty Cheese, Meat and Crackers Platter

As you can see from my other posts, meat is VERY important to me. I love fruits and veggies too, but I am addicted, obsessed, hooked (you get the point) when it comes to meat. I made this spread for some friends that were stopping by my apartment recently. I knew they were coming in advance, so there was no way I would just offer them water or juice while we chatted. This is what I assembled for their visit.
Image
What's in the spread?
Mothergoose Brand Liverwurst- This is my favorite, it's smoky and has a nice meat to fat ratio- YUM
Minced Garlic and Clam Dip  (Pictured in the cabbage leaf)
Melted Brie, topped with Maple Syrup, Strawberry Jelly, Toasted Pecan Nuts and a Sprinkle of Salt, bake just until it starts to melt. This should take about 8- 10 minutes in a preheated oven.
Cucumber- Worked nicely with the clam dip
Assorted Crackers for the Cheese and Liverwurst
Toasted Pita Bread for everything
Fruits- Grapes are a must along with anything else you have in your kitchen
Being the Jamaican lady that I am, I had to serve this up with some delicious Jamaican Rum and set the tone with some reggae music and scented candle. Ah, I love people, the conversations, and laughter never get old.Feeling Good with Beres Hammond
Image

BNW~


Sunday, March 30, 2014

I Made Homemade Mozzarella Cheese and So Should You!

I have been wanting to try to make some more seemingly difficult products at home for a while. Cheese was at the top of the list for the past year but I have always found a reason not to make it. In my defense, the ingredients were not available in the local grocery stores and I couldn't find any specialty shops close by, and it was not worth the effort to track down stores online and make it just for myself. This never left my mind, so I finally bought aaaa-lll-lllll the supplies I needed online (2 items), citric acid and some rennet tablets, I got milk from the grocery store and this is how it all played out.
All of the ingredients and tools needed for this fun experiment
I had already bought the Junket Brand Rennet before I did extensive research about it's strength. Since it is the weakest one on the market, I had to use more than the instructions stated. I found this out on a random website that sells cheese making supplies.
Ingredients
1 Gallon of Whole Milk- Not Ultra Pasteurized
1 1/2 Rennet Junket Tablets, or 1/4 Tablet if you use the strong Cheese Making one- dissolved in 1/4 cup of water
2 Tsps of Citric Acid- dissolved in 1/2 cup of cold water
Salt
You'll also need:
A Thermometer
Slotted Spoon
A Large Microwavable Bowl
A Large Pot
A Microwave
A long knife
Method
Empty milk and citric acid that you've dissolved into a deep pot and stir. Heat milk until it gets to 90 degrees Fahrenheit. Add the rennet and stir to distribute evenly for about 30 seconds and remove from heat. Cover and let sit for 10 minutes. You should have a nicely formed curd separated from the whey. Dice the curd by making horizontal and vertical strokes with your knife and return the pot to the burner to cook the curd. Keeping stirring the curd and as soon as it gets to 105 degrees, remove from the heat.
Time for fun

With your slotted spoon, scoop out the curds into your microwave safe bowl and drain the excess whey. Microwave for one minute, and then knead the curds and drain more whey. The curds will be hot so use a pair of clean rubber gloves and keep the cold water running to cool down your hands in the process. Microwave for another 30 seconds, and stretch and knead some more. This is where it may get tricky, you could stop here, but if your cheese (at this point) is not stretchy and shiny, microwave for another 15 seconds and as you stretch and knead some more, drain and add your salt. I added 1 tsp of salt but this is up to you. I ended up making a brine of water, salt and whey for the cheese because I wanted it to be more salty, so I'd say go with at least 1 and a 1/2 tsp. Fold your cheese and wrap it to form a large ball or small balls for petite mozzarella balls. Served with your favorite fruits, crackers and balsamic and basil soaked tomatoes slices. So yummy, quick and easy and  it's like magic. Enjoy immediately or wrap your cheese and refrigerate for a couple days of enjoyment. Please share this recipe with a friend, come back often.
Recipe should yield just under 1 lb of cheese.
I was so excited that I couldn't wait to cut into my homemade cheese.
BNW~

Please note**** I used the recipe that comes with the Junket Rennet, but made modifications to the amount of rennet I used.

Thursday, March 27, 2014

Baked Whole Orange Chicken

I cannot remember the last time I cooked a whole chicken..you? Anyways, I was walking through the whole food store and saw heavy traffic in the meat area so I joined the crowd. Pork tenderloin, whole chicken, and boneless skinless chicken thighs were all on sale. Hmmmm, I kinda sorta bought all three, it's 50% sale, I cannot afford to pass on these great deals. Here is my little fresh chicken :)
Image
I looked around my kitchen, I had lemon, lime, orange, mango, pears and a couple heavily spotted bananas. I have a thing with bananas, the spottier they are, the harder it is for me to eat them. I am trying to say it in a nice way, but I think they are next to gross. I am getting off topic, so back to the chicken. I decided to use orange and lemon from the fruit bowl. My seasonings rack is overload so I knew I could pull something together to give some bold flavor. These were my ingredients and semi seasoned chicken.
Image
And before I popped it in the oven..... I didn't have an cooking string but found a lovely tutorial on how to truss without a string on YouTube [youtube=http://www.youtube.com/watch?v=S14l9dx3hkw]
Image
Ingredients
1 Whole Chicken
1 Lg Onion
1 Stalk of Celery
1 Orange
1/2 Cup of Orange Juice (if you do not want a crispy skin)
1 Tbsp of Black Pepper
1 Tbsp of Lemon Pepper
1 Tbsp of Rosemary
2 Tbsp of Butter
1 Whole Head of Garlic
A Handful of Cilantro
A Lot of Salt
Method
Remove offal and any giblets from inside the chicken. Season the inside with salt and pepper and add rosemary, thyme,cilantro, garlic, 1/2 onion, 1/2 orange sliced, and 1/2 celery. Truss chicken to keep all of this goodness inside. Season the outside with lemon pepper, salt and black pepper. You have to use a lot of salt so liberally coat every single part of the chicken with salt. Sprinkle the remaining herb,seasonings and orange slices on the bottom of the pan, and pour on 1/4 cup of orange juice. Place the beautifully seasoned chicken on top and bake for an hour and 45 minutes. Meanwhile, heat the remaining orange juice with butter just until it starts to thicken. Baste chicken with the orange butter, 30 minutes before you remove it from the oven and again at the 15 minutes to go mark. Be sure to test the temperature before you declare your chicken COOKED, it should read 170 at the breast area and 180 for the darker pieces of meat. Let stand for 15 mins and then dig in. So delicious. You can add your twist to this dish as I did. I added a bold font to the things that I learned.
Look what happened!
Image
I needed more orange juice in the pan
I dressed it up for dinner...
Image
Beautiful chicken
Enjoy
BNW~